• Home
  • About Me
  • Impressum
  • How Can I Help You?
  • Podcast Recommendations
  • Recommended Reading List
  • People I Follow

Food Fitness and Fun – ByCandace

~ Good Health Made Simple

Food Fitness and Fun – ByCandace

Category Archives: Food

Recipe: All-In-One-Meal – Roasted Salmon with Crab Meat Topping and Asparagus

11 Tuesday Jul 2017

Posted by ByCandace in Food

≈ Leave a comment

Tags

#allinonemeal, #asparagus, #easyandfastmeal, #paleo, #recipe, #wildcaughtsalmon

Tools:

  • Chopping Board
  • Knife
  • Paper Towels
  • Parchment Paper or Silpat
  • Large Zip Lock Bag or Large Bowl
  • Pan (Short Lip)
  • Small Bowl
  • Spoon

Ingredients:

  • 1lb Wild Caught Salmon – (I found it at Trader Joe’s)
  • 1 Bunch of Asparagus
  • 6 oz. Can White-Lump Crab Meat
  • 1.5 Tbs of Avocado Oil
  • 1 – 1.5 Tbs of Apple Cider Vinegar
  • 4 – 6 Tbs Mayonnaise (to taste and creamy consistency)
  • 2 Tbs of Chives (to taste) – (I used homemade dried)
  • Lemon Pepper (to taste)
  • Garlic Powder (to taste)
  • Salt (to taste)Fish Seasoning Blend of Choice (to taste) – (I used Northwoods Seasoning by Penzeys Spices)

Stuff You Need

Directions:

Pre-heat oven or toaster oven to 375 degrees. Cover a short-lip pan in parchment paper or silpat.

Rinse the fish in cold water and lay on paper towels and then use additional paper towels to dry the fish on the top side. Place dried fish on the lined pan bottom side up and season with salt, garlic powder, and seasoning blend of choice. Flip over (top side up) and repeat seasoning. Set fish aside.

Salmon

Cut the ends off the asparagus, place in zip lock bag, add avocado oil, apple cider vinegar, lemon pepper, and garlic powder (optional) and seal the bag. Shake and rub the mixture into the asparagus. Set aside to marinate.

Asparagus

In the small bowl, mix together the crab meat, mayonnaise, chives, lemon pepper (to taste), garlic powder (to taste), and salt (to taste). Place the crab meat mixture on top of the salmon.

Crab Meat Topping
Top Salmon w Crab

Place the asparagus around the salmon and add small amounts of butter over the top.

IMG_4951

Place in the oven for 20 minutes. Broil for an additional 2-5 minutes at 450 – 500 degrees.

Salmon and Asparagus

Done. Eat. Enjoy

I highly encourage you to Sign-up for Thrive Market.

Thrive Market allows you to shop for all the healthy food items you know and love at discount prices, because they cut out the middle man, and it gets delivered to your door so it also saves you time. Not only to you save money, but for every paid membership Thrive Gives a membership to a family in need.

The second best part, aside from saving money, is that all your favorite pantry items will be delivered to your door and you don’t have to go to stores which also saves you time and energy. And who can’t use more money, time, energy?!?!


Share this:

  • Click to share on Facebook (Opens in new window) Facebook
  • Click to share on Pinterest (Opens in new window) Pinterest
  • Click to share on X (Opens in new window) X
  • More
  • Click to email a link to a friend (Opens in new window) Email
  • Click to print (Opens in new window) Print
Like Loading...

Recipe: Side Dish – Roasted Cabbage

27 Tuesday Jun 2017

Posted by ByCandace in Food

≈ 2 Comments

Tags

#lemons, #recipe, #roastedcabbage

This is one of my all-time favorite recipes. It is easy and delicious!

Tools:

  • Chopping Board
  • Large Knife
  • Short-rimmed baking sheet

Ingredients:

  • 1 head of cabbage
  • 2 – 3 lemons
  • Avocado Oil
  • Butter
  • Salt
  • Lemon Pepper
  • Garlic Powder
  • Herbs of Choice – I like pre-mixed herb or spice blends.

Directions:

Pre-heat oven to 350 degrees.

Pull the first couple of layers of cabbage leaves off and discard. Slice cabbage head in ½ inch slices or as thin or thick as you like them; the thicker they are the longer it will take to cook. Also cut out the core on each middle slice and discard, as it doesn’t cook down well enough to eat.

Spray the bottom half of the cabbage slices with avocado oil and season with salt, lemon pepper, garlic powder, and herbs of choice. Place the slices on the baking sheet bottom side down, then squeeze the juice of 3 -4 lemons all over the topside, spray with avocado oil, season, and top with a pad of butter.

Roast in the oven for 1 hour to 1 hour and 15 minutes. Cabbage should be soft all the way through and browned on top and around the edges.

Done. Eat. Enjoy.

Roasted Cabbage 1
Roasted Cabbage 3
Roasted Cabbage 4
Roasted Cabbage 5
Roasted Cabbage 6
Roasted Cabbage 2

This dish is something I usually make at dinner time, but eat it at every meal until it is gone!

Share this:

  • Click to share on Facebook (Opens in new window) Facebook
  • Click to share on Pinterest (Opens in new window) Pinterest
  • Click to share on X (Opens in new window) X
  • More
  • Click to email a link to a friend (Opens in new window) Email
  • Click to print (Opens in new window) Print
Like Loading...

A Few of My New Favorite Things….

17 Wednesday May 2017

Posted by ByCandace in Beauty, Food

≈ Leave a comment

Tags

#beautyproducts, #thrivemarket, Food

Long-Perishable Food Items

Inka Plantain Chips, Chile Picante (2-pack)

The plain ones are tasty too; I usually order both.

Edward & Sons, Black Sesame Brown Rice Snaps

Beauty Product

Mineral Fusion, Graphite Lengthening Mascara

I highly encourage you to Sign-up for Thrive Market.

Thrive Market allows you to shop for all the healthy food items you know and love at discount prices, because they cut out the middle man, and it gets delivered to your door so it also saves you time. Not only to you save money, but for every paid membership Thrive Gives a membership to a family in need.

The second best part, aside from saving money, is that it all gets delivered to my door and I don’t have to go to stores thus also saving me time and energy.

Share this:

  • Click to share on Facebook (Opens in new window) Facebook
  • Click to share on Pinterest (Opens in new window) Pinterest
  • Click to share on X (Opens in new window) X
  • More
  • Click to email a link to a friend (Opens in new window) Email
  • Click to print (Opens in new window) Print
Like Loading...

Batch or Bulk Cooking / Meal Prepping

16 Tuesday May 2017

Posted by ByCandace in Food, Lifestyle

≈ 4 Comments

Tags

#batchcooking, #beprepared, #bultcooking, #eatallthethings, #mealprepping, #varietyisthespiceoflife, Food

Meal prepping….batch or bulk cooking is not a foreign concept….there are hundreds of resources that talk about this practice. And don’t get it twisted….it is a “practice” in the traditional since of the word.

Practice meaning that it is not usually easy to do start with, but after you do it for a while you get better and more efficient at doing it (definition source – my brain).

The basics of what you need:

  1. Time 1x to 2x per week (I like a weekend day and a mid-week day)
  2. Food / Ingredients (make a list, go to the store or farmers market)
  3. Lots of glass or stainless steel containers and zip-lock baggies

Add Some Fun

To make your batch cooking experience more fun, I suggest putting on some groovy music or informative podcast while prepping and cooking. It is fun to bring a friend or loved one in on the fun by batch cooking together and splitting the food. If you have kiddos you can include them on the process as well, the more involved they are the more fun it will be for them to eat the food they helped prepare.

Note: If prepping the food items and cooking it all on the same day is too much; then prep the food (cut, chop, puree, marinate, make sauces etc.) one day and cook it the next day.

Variety is the Spice of Life

My bulk cooking strategy has been to cook-up approximately 3 different meals to last 3 -4 days until my next session. You can also cook up 2 – 3 meats that you can mix match with 2 – 3 starchy carbs sources and veggies. You can also cook enough to last 5 – 7 days, but be sure to freeze half of the food and then pull it out to replace what you use from the fridge. I’ll cook enough veggies to use with breakfast and lunch and cook fresh veggies at dinner time. But, whatever works for you….do that!

The key is cooking enough variety that you don’t get bored or tired of eating the same food. Also, to avoid food boredom if you cook generically spiced food items you can later add different spices or sauces to create a new flavor profile to the meal you are about to eat.

Utilize all the Tools

I’m a bit of a kitchen gadget junkie; anything to make my experience more fun, easier, or faster! You really just needs some pots, pans, baking sheets, your grill and or a crockpot. An Instant Pot also works nicely. Choppers, Food Processors, Blenders etc. etc. can all come in handy depending on what all you want to make.

The plan is the use all of the things at the same time! The more you cook at the same time the shorter the amount of time it takes to complete the objective. Use your crockpot(s) (get them going first), oven, pots and pans (use all 4 or 5 you have), grill, and Instant Pot.

To Recipe or Not to Recipe….That is the Question

So, the question is – do you want to use recipes or not. My suggestion is to do one of three things….1) pick recipes out ahead of time and make a grocery list or 2) go grocery shopping see what looks good to you and then pick out some recipes that will work with what you bought 3) go grocery shopping see what looks good to you and then cook them up however you like, add some condiments and be done.

I like to do a bit of #1 and bit of #3. I like to have a general idea of what I want to cook, find some recipes that look easy, get a grocery list together, pick up some extra generic stuff, then cook it up and mix and match my meals.

I have LOTS of recipes on my Pintrest page. LOTS!

Where to Start? Here are some basics….

As I previously said, you’ll do this once or twice a week.

After you have all your ingredients, you can start prepping it, most of my dishes start with a base of onions so I usually chop those first and get them sautéing/browning (butter, salt, pepper, and garlic powder).

If you are doing something in the crockpot, get that meal in and cooking first – cause it is the slowest. If you are doing chili or greens or peas get those going now because they will cook for a few or more hours.

Then get your meats prepped and cooking – likely next would be the whole chicken or the bone-in and skin-on chicken as it takes time to cook. Then your beef items. If you are precooking bacon; I would do that now as well, so you can use your bacon grease (if it is high-quality bacon) for roasting veggies.

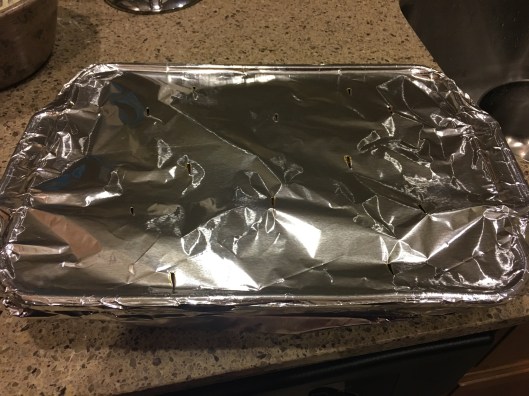
Once your oven is free from meat you can roast your veggies and potatoes; use two wracks and get it done. You can also roast your veggies and potatoes with and around your chickens; they will get good flavor soaking up the chicken drippings. I also have a counter-top convection oven I use as well.

While you are cooking all that also put on a pot of rice or use a rice cooker.

There will be a point when all things are cooking – this is when you chop your raw veggies for grab-n-go and wash-up dishes and utensils to get them out of the way.

You can also cook up one-pot-meals or casseroles. The book “One-Pot Paleo” is fantastic!

Food Stuff

Since Protein is the most time consuming part of cooking meals, at the very least make sure you have enough proteins cooked for each meal for 4 – 7 days. If that is all you prep each week, it will save you so much time!

Chicken / Turkey / Duck

Skinless boneless breast or thighs for quick stir-fry or Asian inspired food dishes, whole baked or crockpot chicken to just eat and to make things like chicken salad or shredded chicken for tacos, grilled or baked crisp dry-rub wings, for easy snacks. Save your bones and throw them in a pot to make broth.

Beef / Bison

Ground beef (grass-fed/finished is the best quality) or ground bison sometimes I mix the two together. I probably cannot adequately describe out versatile this meat is. I like to cut some onions up and sauté them nice and brown in butter, salt, pepper, and garlic powder, then add in the ground beef and add more, salt, pepper, and garlic powder till done (but not dry). This base can be then later used for dinners where you will add extra spices to create various meals like Mexican or Italian. I also like to make meatballs with salt, pepper, garlic powder and an herb blend of some sort – easy to bake them in the oven. I like to pre-make a bunch of burger patties and put them in ziplock bags. I like to have some pre-cooked and some raw (parchment paper in between) in the freezer for easy grab and go. Putting a beef or pork roast in the crockpot is easy and delicious; you can even add in a bunch of root veggies (others will get too soggy) and you have a one-pot-meal. Pre-grilling various types of steaks (keep them at least medium-rare so when you warm them back up it won’t get over cooked). I like to make a double recipe of Spicy Pineapple Chili and keep it in my freezer at all times. When I run low, I make another batch.

Pork

I love to pre-cook a whole package of bacon, creating individualized portions in zip-lock bags to eat with my eggs for breakfast and some for crumbling up and adding to other dishes. I also like having pre-cooked sausages available to easily pull out for breakfast or snack – add some spicy mustard, sauerkraut, and cheese. Yummm! Again a nice pork roast in the crockpot is so easy. You can also cook up pork chops and tenderloins in the crockpot or oven, do your best to not overcook or cook on too high of heat (in the oven, stove-top or grill) because they will get tough and dry.

Seafood

I tend not to bulk seafood. It takes very little time to cook and doesn’t preserve very well. If you are going to eat it the next day you can pre-cook a filet of fish or boil some shrimp, but I’d eat them pretty quickly. I love salmon cakes, so keeping cans of salmon in the pantry is a must for fast meals. They are fast to put together and cook – if you make enough you will have some to eat the next day too for added variety to the week. (How-To: Cook Scallops Perfectly)

 Eggs

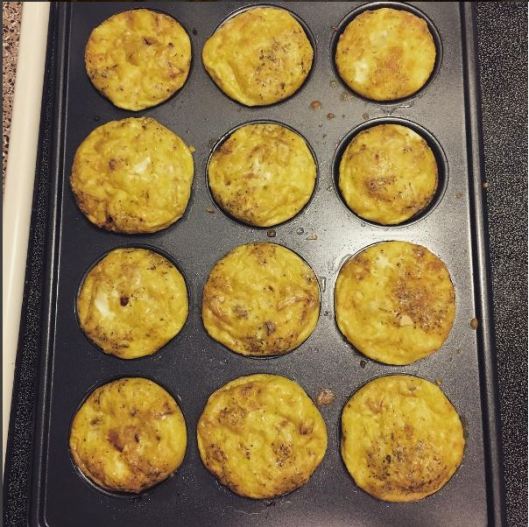
I personally don’t consider eggs a protein necessarily I consider them a healthy fat. I prefer spending an extra couple of bucks to get fully pastured / free range eggs like Vital Farms. I like to batch cook “egg muffins” with meat and veggies in them – heat up and eat with hot sauce. Also, I will pre-cook soft or hard boiled eggs for grab-n-go breakfast with pre-cooked sausage or bacon.

Starchy Carbohydrates

Easy-peasy! Roast or bake some potatoes, yams, sweet potatoes, and or winter squash. Cook up a pot of black, brown, or white rice. I also will occasionally cook up some plantains; but not very often. I love these Plantain Chips to eat my chicken salad on.

Vegetables

One of the easiest things I like to do is to roast a BIG pan of veggies together. I will add onions, carrots, parsnips, brussel sprouts, beets, turnips, radishes all on one pan together with some avocado oil or ghee with some lemon juice, salt, pepper, garlic powder, and herb blend and roast them up till they are soft and browning.

I like to pre-roast cabbage steaks, broccoli, and cauliflower – basically with the same oil, citrus, and spices as above. I love asparagus, but I’m not big on bulk cooking it; tastes better fresh. You can also roast or sauté yellow squash and zucchini to mix match.

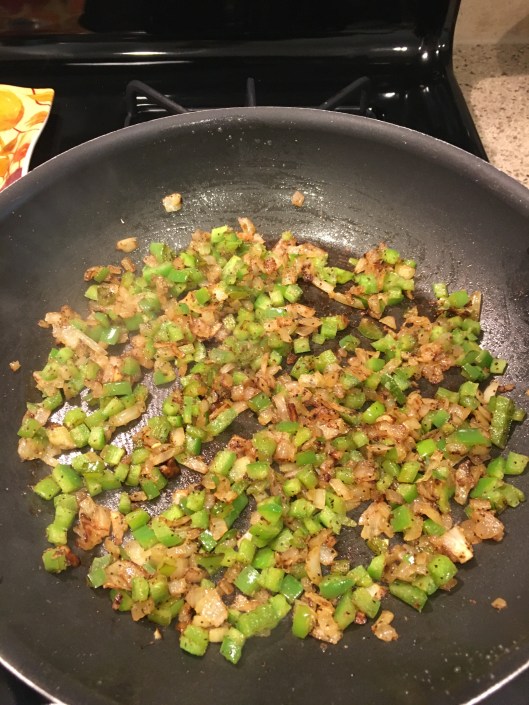
I also like to sauté onions, all the colors of bell peppers, and garlic with lemon or lime juice, salt, and pepper and keep it in containers to add to dishes for extra flavor. If you like mushrooms add those in too.

You can add these to any meal of the day – throw some fried eggs over the top with crumbled back or sliced sausages, add your meat of choice to them for lunch or dinner with a side salad.

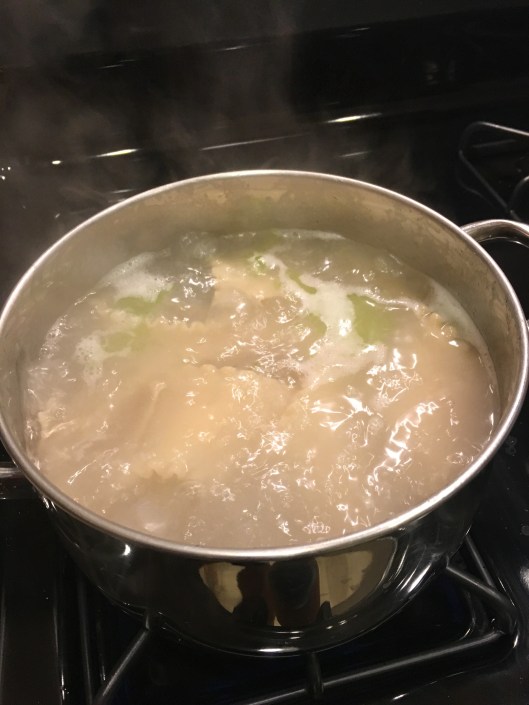
During the winter I like to make large pots or slow-cooker of greens, usually a mix of collards, mustard, and turnip. I do the same thing with peas and keep them in my freezer all the time to pull out at any given meal. I cook up ½ to 1 pkg of bacon, in the same pot I add onions to brown with salt and pepper, then garlic cloves, then add stock/broth, water, ½ cup of Apple Cider Vinegar, red pepper flakes or ¼ to ½ cup of Frank’s Hot Sauce, and all the greens with additional salt, pepper, and garlic powder. Same for the peas except I don’t add the vinegar and hot sauce.

Raw Veggies

I keep lemons and limes in bulk in my refrigerator at all times and I use them all the time for all the things.

It is always good to have grab-n-go veggies in the fridge or at least veggies you can quickly cut and eat. Love to have cucumbers, carrots, broccoli, sprouts, and lettuces in the fridge so that I can snack or have a salad with some meat that is fast and easy.

Fruit

During the summer time I eat more fruit than winter time, because they are fresh and in season. I will keep some fruit around. I’ll keep a couple of apples or banana to easily grab-n-go. I love grilled peaches, tangerines, and pineapple to add to my pork and chicken dishes. Berries and homemade whipped cream for a treat. When cherries and watermelon are in season, I eat them for a couple or few weeks until I’m tired of them. If fruit floats your boat then add that in too. I incorporate avocados into my meals every week as well.

Side Notes

You want to cook the food till it is done and flavorful, but not so much that when you warm it up later that it is dry. With this in mind, at the end when put your food in containers you will want to add a touch of bone broth, lemon or lime juice, Ponzu sauce or other to the container so when you warm it up it has extra moisture already and it doesn’t try out. Also add a dipping sauce (tzatziki, quacamole, almond butter, homemade ranch, hummus) or something after you warm it up to add to the variety of the meal.

I am all about brining my chicken it give it so much more flavor and keeps it moist.

Storage

I like to use glass containers, stainless steel, or at the very least BPA free plastic.

No Food Poisoning Here!

  • Allow the food items to completely cool before placing them in the refrigerator or freezer. Rapid cooling is best – I use a fan
  • Put half of your prepared proteins in the refrigerator and the other half in the freezer; as you eat the ones in the refrigerator pull one out of the freezer to replace it
  • When reheating your food, make sure you get them nice an hot for at least 10 or 15 mins (boil, hear sizzling) (unless you are using a microwave) to kill bad bacteria. This webpage to make sure the food is over 165 degrees.

This mini crock-pot food warmer is so awesome!

Are you Fully Prepared for Your Week Now?

While this is about bulk cooking, it is also about being prepared for your week. Snacks are important. If I am able to, I prefer to have smaller containers/portions of the foods I bulk cook as my snacks. If I am on the go, I like to have beef sticks, cheese slices, a few nuts, a piece of fruit, a shaker bottle of protein powder or this one, seasnax, or even some of the grab-n-go veggies in a baggie in my purse or vehicle. And don’t forget water!


Share this:

  • Click to share on Facebook (Opens in new window) Facebook
  • Click to share on Pinterest (Opens in new window) Pinterest
  • Click to share on X (Opens in new window) X
  • More
  • Click to email a link to a friend (Opens in new window) Email
  • Click to print (Opens in new window) Print
Like Loading...

Recipe: All-In-One-Meal – Unstuffed Cabbage Rolls

30 Thursday Mar 2017

Posted by ByCandace in Food

≈ 2 Comments

Tags

#bonebroth, #cabbage, #grassfedgroundbeef, #kettle&fire, #maindish, #meyerlemons, #onepotmeal, #recipe, #rice, #tinstarghee

Tools:

  • Chopping Board
  • Knife
  • Large Deep Pan w/ Lid
  • Spatula and or Large Spoon

Ingredients:

  • 1 – 2  Lemons  to taste
  • ½ – 1  Cup of Broth
  • 1  Can Tomato Sauce
  • 1  Can Diced Tomatoes
  • 1  Head Green Cabbage or Savoy Cabbage
  • 4  Cloves Garlic
  • ½  Large Bell Pepper (color of choice)
  • 1  Yellow Onion
  • 1 lb  Ground Elk or Bison
  • 1 lb  Ground Grass-fed Beef

Seasonings:

  • Butter or Ghee
  • Salt
  • Black Pepper
  • Garlic Powder
  • Lemon Pepper
  • Red Pepper Flakes

Directions:

Chop onion into small even sized pieces and saute in pan with butter or Ghee, season with salt, black pepper, and garlic powder over a medium-high-heat. While you onion is cooking, chop bell pepper into small even sized pieces and mince garlic cloves.

Pan
Tin Star Ghee
Veggies
Frozen Lemon Juice
Ground Meat

Once the onion is ½ way cooked, add the bell pepper with a little more salt and garlic powder. Once they are soft and have some color on them (de-glaze pan with broth or lemon juice) add the ground meat and season with salt, black pepper, and red pepper flakes (if you desire). Add in any seasoning or herb to the meat you prefer, the more flavor the better.

Onion & Bell Pepper
Add Meat
Meat

While the meat is cooking, chop the cabbage into large long strips. (Cooking Tip: Because cabbage cooks down, if you cut the pieces too small they will dang near disappear in this dish.)

Once the meat is cooked through and is nice and brown, add in the minced garlic and cook for a few mins. Add the chopped cabbage, diced tomatoes, tomato sauce, juice of two lemons (I used previously frozen lemon juice), and more of each seasoning. Place lid.

Browned Meat
Cooking Down
Lid On - Wilt Cabbage

Reduce to medium-heat and cook for approximately 20 minutes; after this time the cabbage should be wilting and easier to mix/stir. Stir well and if more liquid is needed to continue the steaming of the cabbage add in bone broth or white wine and maybe a little more lemon juice and salt and place lid back on and continue to cook for 30 – 40 minutes, stirring occasionally.

If you so choose, this dish is served well over rice. This is the time to make rice, with approximately 30 – 35 minutes of cook time left. I personally like to cook rice in bone broth and a couple of dashes of salt instead of water to add in nutrients and flavor.

Rice & Broth

Cooking Tip: As you may have noticed, I season each layer as it goes in the pan, this allows for the flavor to build as the dish progresses through the cooking process, if you do not the dish may turn out bland.

Done. Eat. Enjoy.

Unstuffed Cabbage Over Rice

I highly encourage you to Sign-up for Thrive Market.  

The annual fee is less than Sams Club or CostCo at $59.95 per year. Since March 2015 and today, I have saved $1,222.28 purchasing through Thrive Market. The second best part, aside from saving money, is that it all gets delivered to my door and I do not have to go to stores thus saving me time and energy as well.

Thrive Market allows you to shop for all the healthy food items you know and love at discount prices, because they cut out the middle man, and it gets delivered to your door so it also saves you time. Not only to you save money, but for every paid membership Thrive Gives a membership to a family in need.

Share this:

  • Click to share on Facebook (Opens in new window) Facebook
  • Click to share on Pinterest (Opens in new window) Pinterest
  • Click to share on X (Opens in new window) X
  • More
  • Click to email a link to a friend (Opens in new window) Email
  • Click to print (Opens in new window) Print
Like Loading...

Recipe: Main Dish – Baked Chicken Leg Quarters

21 Saturday Jan 2017

Posted by ByCandace in Food

≈ 4 Comments

Tags

#bakedchicken, #chicken, #recipe

First, please allow me to ask you…please source your chicken as best as you can. It really is so very important not only for your health, but also for our environment. Vote with your dollar. If you struggle with costs, buy in bulk…also…with each meal eating twice as many vegetables than meat allows you to eat high-quality meats but overall eating less of them thus cutting down the costs.

  • Yonder Way Farm
  • US Wellness Meats
  • Polyface Farms
  • Zaycon Fresh
  • Fran’s Fryers
  • Local Harvest
  • Eat Wild

Second, if you want the most delicious chicken ever….brining is a very key step.

Recipe: Main Dish – Baked Chicken Leg Quarters

Tools:

  • Paper towels
  • Large short-rimmed baking sheet
  • If you want: Foil, Silpat, or Parchment Paper
  • Tongs

Ingredients:

  • Chicken Leg Quarters
  • Avocado Oil
  • If you want: Lemons or Limes
  • Spices of Choice – If you like super easy use a pre-mixed herb and or spice blend

    Seasoning Options:

  • General – Salt, Pepper, Garlic Powder, and Bragg’s 24 Herbs & Spices Seasoning
  • General – Salt, Pepper, Garlic Powder, Onion Powder, Paprika
  • Lemon Pepper – Salt, Pepper, Lemon Zest
  • Greek – Salt, Pepper, Garlic Powder, Onion Powder, Paprika, Basil, Oregano, Thyme, Dill, Rosemary, Nutmeg, Parsley
  • Greek – Salt, Pepper, Garlic Powder, Onion Powder, Basil, Thyme, Mint, Marjoram, Chives
  • Italian – Salt, Pepper, Garlic Powder, Onion Powder, Oregano, Basil, Parsley
  • Mexican – Salt, Pepper, Garlic Powder, Onion Powder, Paprika, Oregano, Parsley, Chili Powder, Cumin
  • Cajun – Salt, Pepper, Garlic Powder, Cumin, Coriander, Paprika, Cayenne, Oregano

Directions:

Preheat oven to 350 degrees.

Remove chicken from brine, rinse in cold water, and place on paper towels. Use additional paper towels to dry the chicken. Use avocado oil to grease the short-rimmed baking sheet. If you choose to use lemons or limes, slice them thinly and place a layer on the bottom of the short-rimmed baking sheet.

Once the chicken is dry, smear with avocado oil or butter on the underside of the chicken and season with spices of choice. Then place on the short-rimmed baking sheet, bottom side (you just seasoned) down.

Then smear with avocado oil or butter on the skin-side of the chicken and season with spices of choice.

If using lemon or limes and have some left over, place the remainder of slices around the chicken pieces. Also, if using fresh herbs you can put them under the skin of the chicken with some butter for increased flavor.

Place in oven for 1 hour to 1 hour and 15 minutes (non-convection time). The skin will be or should be brown and crisp. If it isn’t crisp and you have a convection function use the convection for the last 10 minutes of baking or use the broiler function for the last 5 minutes of baking.

Pull out of the oven and allow to rest for 10 to 15 minutes before eating.

Done. Eat. Enjoy.

chicken-5
chicken-3
chicken-4
chicken-2

I highly encourage you to Sign-up for Thrive Market. 

The annual fee is less than Sams Club or CostCo at $59.95 per year. I saved over $1,000 in 2016 purchasing through Thrive Market. The second best part, aside from saving money, is that it all gets delivered to my door and I don’t have to go to stores.

Thrive Market allows you to shop for all the healthy food items you know and love at discount prices, because they cut out the middle man, and it gets delivered to your door so it also saves you time. Not only to you save money, but for every paid membership Thrive Gives a membership to a family in need.

Share this:

  • Click to share on Facebook (Opens in new window) Facebook
  • Click to share on Pinterest (Opens in new window) Pinterest
  • Click to share on X (Opens in new window) X
  • More
  • Click to email a link to a friend (Opens in new window) Email
  • Click to print (Opens in new window) Print
Like Loading...

Recipe: Breakfast – Egg Muffins

12 Thursday Jan 2017

Posted by ByCandace in Food

≈ Leave a comment

Tags

#breakfast, #eggmuffins, #eggs

Egg Muffins are one of my favorite batch or bulk breakfasts and snack items.

Key Ingredients:

  • Pastured / Free Range Eggs
  • Protein of Choice
  • Veggies (if you have limited time, buy pre-cut veggies)
  • Starch (if you are not eating carbs for breakfast or are low carb, omit)

Protein Ideas: Ground Sausage or Meat of any kind, Bacon, Pork Chop or Loin, Left-over Chicken or Steak

Veggie Ideas: Pico de gallo, Garlic, Spinach, Broccoli, Cauliflower, Asparagus, Artichokes, Yellow Squash, Zucchini, Bell Peppers, Green Onions, Tomatoes

Starch Ideas: Potato, Sweet Potato, Butternut Squash

Making Egg Muffins

I like to use a 12 cup muffin tin. Preheat the oven to 350 degrees. Grease each cup or use silicone inserts.

Season and cook your protein (don’t cook all the way, it will finish in the oven) and chop the protein into small pieces. While the meat is cooking chop the veggies. I like to sauté the veggies in butter, salt, pepper, and garlic for flavor. I use the same pan as I used to cook my protein in. If I’m just using pico de gallo I don’t cook it first. Beat 12 eggs in a bowl, add salt, pepper, and herbs of choice.

Note: Keep in mind that the cups are shallow so only a little of each layer can go into the cups.

If you are using a starch, either chop it in small pieces or grate it, season it and place in the bottom of each cup. If you are omitting starch, then spoon the meat into the bottom of each cup – otherwise add a spoon of meat on top of the starch layer. Then add a spoon of the veggies. Then ladle in the egg.

If you like and can tolerate cheese, you can sprinkle with cheese.

Note: Season each layer, so they don’t turn out bland. If I have a pesto on hand, sometimes I’ll swirl pesto into the top of each one before baking.

Place in the oven for 25 – 30 mins. Pull-out and place muffins on a cooling rack. After they are cool, put in individual sized portions in Ziploc bags in the fridge.

These are awesome with some franks hot sauce!

egg-muffins

Pizza Variation:

  • Chopped Pepperoni
  • Mozzarella Cheese
  • Chopped Tomatoes
  • Fresh Sautéed Garlic
  • Mushrooms (Optional)
  • Dried Basil
  • Dried Italian Seasoning
  • Salt & Pepper

Another Variation:

  • Small Pieces Prosciutto
  • Chopped Pre-Cooked, Seasoned Asparagus
  • Goat Cheese
  • Garlic Powder
  • Salt & Pepper

There is literally unlimited flavor combinations and variations you can make.

Share this:

  • Click to share on Facebook (Opens in new window) Facebook
  • Click to share on Pinterest (Opens in new window) Pinterest
  • Click to share on X (Opens in new window) X
  • More
  • Click to email a link to a friend (Opens in new window) Email
  • Click to print (Opens in new window) Print
Like Loading...

Recipe: Side Dish – Slow Cooking ‘Greens’ with Bacon

30 Wednesday Nov 2016

Posted by ByCandace in Food

≈ 1 Comment

Tags

#bacon, #greens, #instantpot, #recipe, #sidedish, #slowcooker, #southernstyle

Growing up in Texas ‘Greens’ is something I grew-up eating. My grandmother would pick and cook polk salad greens, collard greens, turnip greens, and mustard greens. I honestly can’t remember if I liked them or not, but I certainly remember them cooking in a BIG pot on the stove with a giant ham hock in them.

I like to cook mine an easy way. I start them in the morning and they are ready by dinner.

Recipe: Side Dish – Slow Cooking ‘Greens’ with Bacon


Tools:

  • Large Slow Cooker
  • Chopping Knife
  • Cutting Board
  • Frying Pan
  • Large Slotted Spoon
  • ½ cup measuring cup

Ingredients:

  • ½ – 1 lb of Thick-cut Peppered Bacon
  • 1 Yellow or White Onion
  • 6 – 10 garlic cloves
  • Greens (of choice) I like the Great Greens Trio at HEB (because they are easy. I usually am a stickler for organic, but sometimes easy wins out)
  • 32 oz Homemade or Purchased Bone Broth
  • ½ cup of Apple Cider Vinegar
  • ½ cup Franks Original Hot Sauce
  • Seasonings: Salt, Pepper, Garlic Powder
  • Water (filtered)

Directions:

Chop the onion first and set aside. Chop the garlic cloves and set aside (do not mix with onions).

Then cut the bacon (cut 5+ strips, stacked at a time) in 1” pieces and fry in your pan, I like to add some garlic powder to my bacon while it cooks to layer flavor. Transfer the bacon after fully cooked into the slow cooker.

If you have an overabundance of bacon grease pour it into a glass jar leaving enough in the pan to sauté the onions and garlic. Then put the onions into the pan, season with pepper, garlic powder, and a little salt until nice and brown. In the last few mins add in your garlic cloves – as soon as you can smell the garlic remove from heat and transfer into the slow cooker.

Pour in the bone broth (should be about ½ way up the side of the crock pot). Add the ACV and hot sauce. Stir.

Dump in ½ the pre-washed pre-cut greens of choice and season then add in the rest and season again. Squish it all down in the liquid with your hands.

Then fill the rest of the crock pot with filtered water, leaving at least 1” of room at the top.

Secure lid and cook on high for 6 hours or on low for 10-12.

slow-cooker-greens
greens

I’m certain this recipe can be easily done in an Instant Pot as well, sautéing the bacon first, then the onions and garlic, then adding in the liquid, greens, and cooking. I’ve not cooked greens in it yet so I’m not sure how long to suggest setting the heat/timer for…..perhaps we would use the “Soup” button?

I highly encourage you to Sign-up for Thrive Market. The annual fee is less than Sams Club or CostCo at $59.95 per year. I will save over $600 this year alone purchasing through Thrive Market. The second best part, aside from saving money, is that it all gets delivered to my door and I don’t have to go to the store.

Thrive Market allows you to shop for all the healthy food items you know and love at discount prices, because they cut out the middle man, and it gets delivered to your door so it also saves you time. Not only to you save money, but for every paid membership Thrive Gives a membership to a family in need.

Share this:

  • Click to share on Facebook (Opens in new window) Facebook
  • Click to share on Pinterest (Opens in new window) Pinterest
  • Click to share on X (Opens in new window) X
  • More
  • Click to email a link to a friend (Opens in new window) Email
  • Click to print (Opens in new window) Print
Like Loading...

Recipe: All-In-One-Meal – Meat Lasagna

19 Wednesday Oct 2016

Posted by ByCandace in Food

≈ 2 Comments

Tags

#lasagna, #maindish, #recipe

I made this for dinner this past Saturday night and it was a big hit! It does take time to make, so only make this when you have plenty of time.

We were planning to eat dinner around 7:30p and I started cooking at 5:30p. I placed it in the oven around 6:30-ish and we ate around 7:30-ish.

Recipe: Main Dish – Meat Lasagna

Tools:

  • Chopping Board
  • Knife
  • Large/Deep Pan
  • Spatula
  • Large Plate
  • Medium Size Bowl
  • 2 Big Spoons
  • Lots of Paper Towels
  • Trash Can
  • Pot
  • Slotted Spoon
  • Colander
  • 9×13 baking dish

Sauce Ingredients:

  • Butter
  • Small or ½ Large Yellow or White Onion
  • 1 Organic Green Bell Pepper
  • Sliced Mushrooms (optional – my family doesn’t like them so I don’t use them)
  • 1 lb of Grass-fed Ground Beef or 1 lb of ground pork Italian sausage (or half and half of each)
  • 1 Tbs Fresh Minced Garlic
  • 1 15oz Can Petite Diced Tomatoes – Drained
  • 1 32oz Jar of Marinara Sauce
  • 1/4 – 1/2 tsp Dark Brown Sugar
  • 1/8 Lemon

Cheese Mixture Ingredients:

  • 16oz – 20oz of Whole Milk Ricotta Cheese
  • 1 8oz Pkg of Softened Cream Cheese
  • 1 – 2 tsp of homemade or jar Basil Pesto
  • ¼ Cup of Parmesan Cheese

Other:

  • Lasagna Noodles
  • Shredded Cheese of Choice (Mozzarella or Italian Cheese Blend)
  • Salt
  • Black Pepper
  • Powered Garlic
  • Italian Seasoning
  • Pinch Red Pepper Flakes
marinara-diced-tomato
brown-rice-lasagne-noodles
brown-sugar-lemon
shredded-cheese

Directions:

Place 16 – 20 oz of ricotta cheese on a large place and press it flat. Cover with paper towels, as the paper towels get wet, remove and replace. I went through a lot of paper towels, but drawing the moisture out of the ricotta will prevent the lasagna from being watery. I did this process for approximately 1 hour prior to layering. Alternatively, you could use a cheese cloth and squeeze the moisture out of the cheese.

ricotta-cheese-on-plate
ricotta-covered

Chop onion and green bell pepper in small equal size pieces. Place onion in hot pan with butter to brown over a medium-high heat. Add salt, pepper, and garlic powder. When onions are brown add green bell pepper, add more salt, pepper, and garlic powder. Continue to sauté over a medium-heat until brown. At this time, add the mushrooms if you show choose (add butter, and more seasonings as before). The key is to add seasonings to each layer of ingredients.

sauted-onion-green-bell-pepper

Add the ground meat, salt, pepper, a pinch of red pepper flakes, and 1 Tbs of fresh minced garlic. Continue to cook over a medium-heat until meat is browned.

add-meat
browned-meat

Add the drained can of tomatoes, salt, pepper, and stir – then cook over a medium-heat the rest of the liquid out of them. Then add the jar of marinara sauce, salt, Italian seasoning, and stir – cook to reduce/thicken on a low-medium heat until the rest of the components are ready to layer.

add-can-tomato
add-sauce
sauce

Pre-heat oven to 375°.

Bring a pot of water with salt to a boil. Add noodles, stir and cook according to package instructions.

cooking-noodles

While cooking noodles, mix your Ricotta cheese, cream cheese, basil pesto, and parmesan cheese together in a bowl and set aside.

cream-cheese
mixed-cheese

Once noodles are done, drain and rinse with cold water, and return to a pot of cold water (this will keep them from sticking together and getting gummy). Pat noodles dry just before layering. I placed paper towels out on my counter top, put 3 noodles down, and placed paper towels on top to pat dry.

Turn off the stove under the sauce.

Line up your 9×13 pan, sauce, cheese mixture, noodles, and paper towels on the counter for easy access.

Time to build…..

  • Add a thin layer of meat sauce to bottom of pan
  • Dry and layer 3 noodles (length wise in pan)
  • Add more meat sauce
  • Generous layer of shredded cheese
  • Dry and layer 3 noodles (length wise in pan)
  • Add entire cheese blend mixture
  • Add more shredded cheese
  • Dry and layer 3 noodles (length wise in pan)
  • Add the remainder of the meat sauce
layered-in
layers

Cover with foil and puncture small vent holes with a knife. Bake for 30 minutes.

foil-with-vents

Remove from oven and remove the foil. Add a liberal amount of shredded cheese of choice and bake for another 20 minutes. Remove from oven and let sit for 10 minutes.

image

Done. Eat. Enjoy.

I highly encourage you to Sign-up for Thrive Market

Thrive Market allows you to shop for all the healthy food items you know and love at discount prices, because they cut out the middle man, and it gets delivered to your door so it also saves you time. Not only to you save money, but for every paid membership Thrive Gives a membership to a family in need.

Share this:

  • Click to share on Facebook (Opens in new window) Facebook
  • Click to share on Pinterest (Opens in new window) Pinterest
  • Click to share on X (Opens in new window) X
  • More
  • Click to email a link to a friend (Opens in new window) Email
  • Click to print (Opens in new window) Print
Like Loading...

How-To: Boil Shrimp Perfectly!

27 Tuesday Sep 2016

Posted by ByCandace in Food

≈ 2 Comments

Tags

#braggsapplecidervinegar, #How-To, #shrimp

It is so quick and easy to boil shrimp perfectly, people mess it up!

Tools:  pot, strainer, slotted spoon, big bowl, ice

Ingredients: large wild-caught shrimp, lemon, creole seasoning, apple cider vinegar

Optional Ingredients: Lager Beer

Instructions:

Put pot with water, whole squeezed lemon (put the whole thing in after squeezing), 1/8 to 1/4 cup of apple cider vinegar, 1/2 lager beer if you choose, and creole seasoning (the more you add the more flavor will infuse) in the water and bring to a boil

Put strainer in one side of your sink and large bowl with ice water in the other


Once water is boiling, add shrimp, give it a quick stir

Note: after shrimp are added the water may not boil again, don’t worry

Let cook for a couple of minutes and stir again – stir enough to make sure the shrimp aren’t sticking

It won’t’ take long…..

Once you see 1 or 2 of the shrimp float to the surface – immediately drain (to avoid overcooking) and then dump into the bowl of ice water (to stop the internal cooking process)


For a quick and easy dipping sauce: Mix ketchup and prepared horseradish, to taste.

Done! Eat! Enjoy!

Share this:

  • Click to share on Facebook (Opens in new window) Facebook
  • Click to share on Pinterest (Opens in new window) Pinterest
  • Click to share on X (Opens in new window) X
  • More
  • Click to email a link to a friend (Opens in new window) Email
  • Click to print (Opens in new window) Print
Like Loading...
← Older posts
Newer posts →

Enter your email address to follow this blog and receive notifications of new posts by email.

Follow Food Fitness and Fun – ByCandace on WordPress.com

Categories

  • Babies: Before, During & After
  • Beauty
  • Book Review
  • Books
  • Essential Oils
  • Fitness
  • Food
  • Fun
  • General
  • Lifestyle
  • Nutrition
  • Travel

Facebook: ByCandace

Facebook: ByCandace

Recent Posts

  • HIFU Skin Tightening Treatment
  • Another New Year
  • Recipe: Side Dish – One-pan Roasted Veggies
  • I am….
  • The Law of Action
  • The Muscle Stick
  • On-Going Lifting Commitment to Myself

Purchase Kasandrinos Olive Oil with Discount Code: BYCANDACEKEVO

Sign-up to Purchase Young Living Essential Oils & Products

Pages

  • About Me
  • How Can I Help You?
  • Impressum
  • People I Follow
  • Podcast Recommendations
  • Recommended Reading List

Blog at WordPress.com.

  • Subscribe Subscribed
    • Food Fitness and Fun - ByCandace
    • Join 94 other subscribers
    • Already have a WordPress.com account? Log in now.
    • Food Fitness and Fun - ByCandace
    • Subscribe Subscribed
    • Sign up
    • Log in
    • Report this content
    • View site in Reader
    • Manage subscriptions
    • Collapse this bar
 

Loading Comments...
 

    %d